
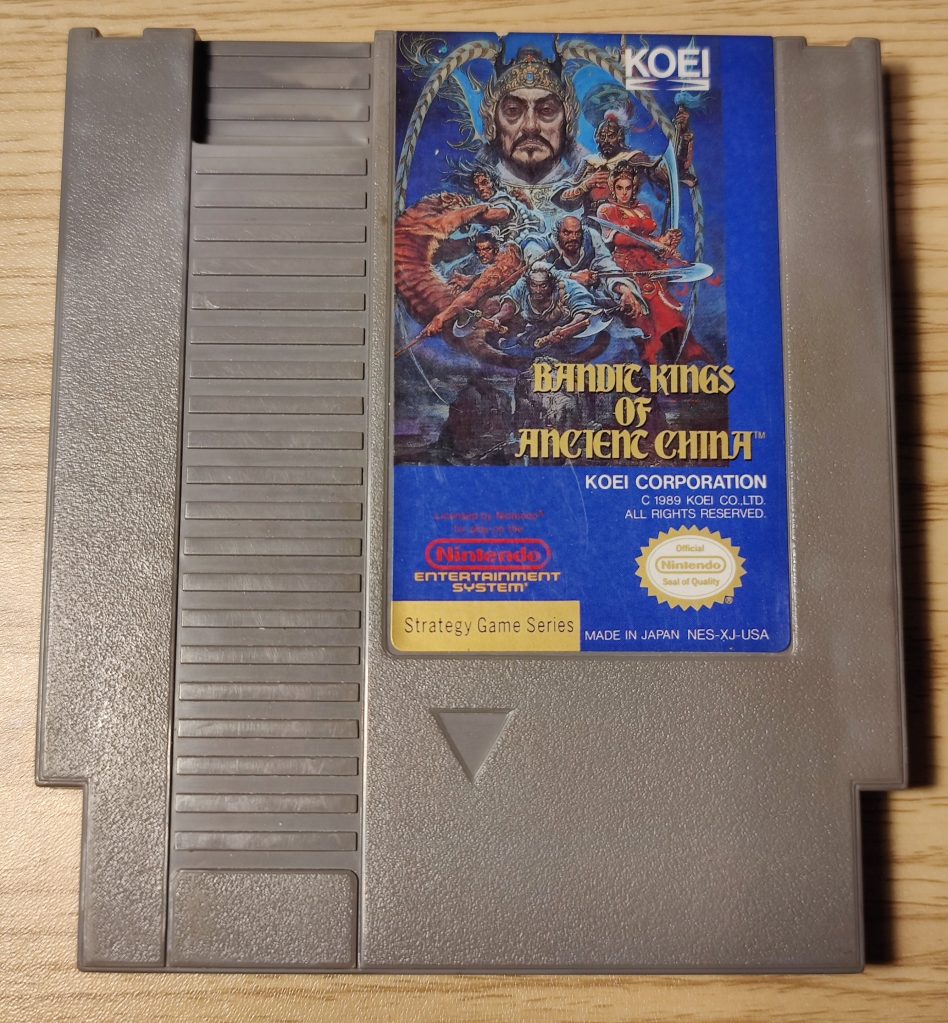
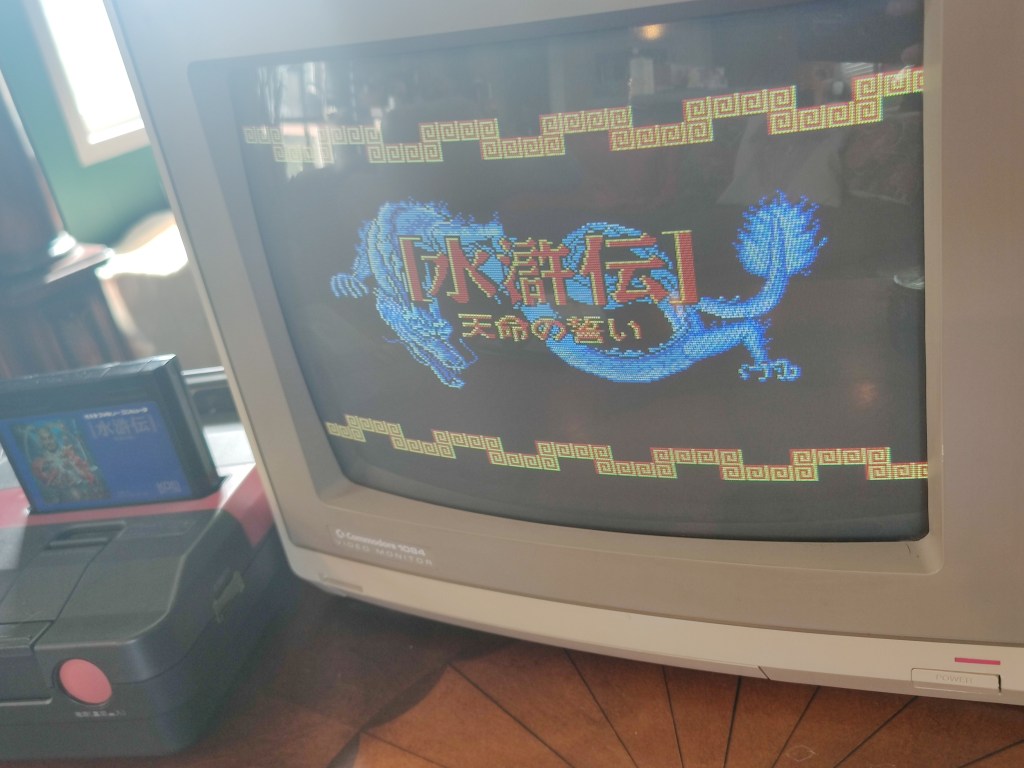
Bandit Kings of Ancient China is one of my favorite games. It’s a strategy game, which makes it a bit of a weird fit for the NES. Originally released for the PC-88 and later ported to several other platforms, the fact that Koei brought it to the NES is one of the reasons I appreciate it so much. I’ve always been a fan of ambitious ports.
The game is based on a classic Chinese novel from the Ming dynasty. It’s a work of historical fiction known by a few different titles: Water Margin, Outlaws of the Marsh, or All Men Are Brothers. Its literary tropes have been used throughout history and can still be seen in modern games—like the Yakuza series, for example.
It’s basically about a bunch of societal outcasts and bandits in conflict with a corrupt Song government. It’s a bit more complex than that, but that’s the gist of it—and I’m all for overthrowing an evil, incompetent government.

The best part of the video game is that you get to play as some of the great heroes from the story. One of my favorites is the “Tattooed Priest”—Lu Zhishen, his true nickname being the Flowery Monk. Early in the book, Lu meets a woman singer who became a butchers concubine to pay for her mother’s funeral. But the butcher’s wife drove the singer away before any money was exchanged. The butcher now demands the singer pay him back with interest. Trapping the singer and her elderly father till the ‘debt’ is paid. Lu gives the singer money to leave town. Then he heads to the butcher’s and orders 13 pounds of minced meat. After nearly an hour of chopping, the butcher finishes—only for Lu to demand 13 pounds of minced fat. Once that’s done, Lu asks for 13 pounds of minced cartilage. By now, the butcher knows he’s being messed with. Lu then throws the 26 pounds of meat and fat at the butcher. Enraged, the butcher lunges at Lu with the knife. But with just three punches, Lu inadvertently kills him, making Lu an outlaw who later becomes a monk to escape the law. Crazy, right? Lu Zhishen is known for his incredible strength—he wields an 82-pound bo staff. At one point in the story he rips a tree out of the ground and waves it around. I mean, who wouldn’t want to play as him?
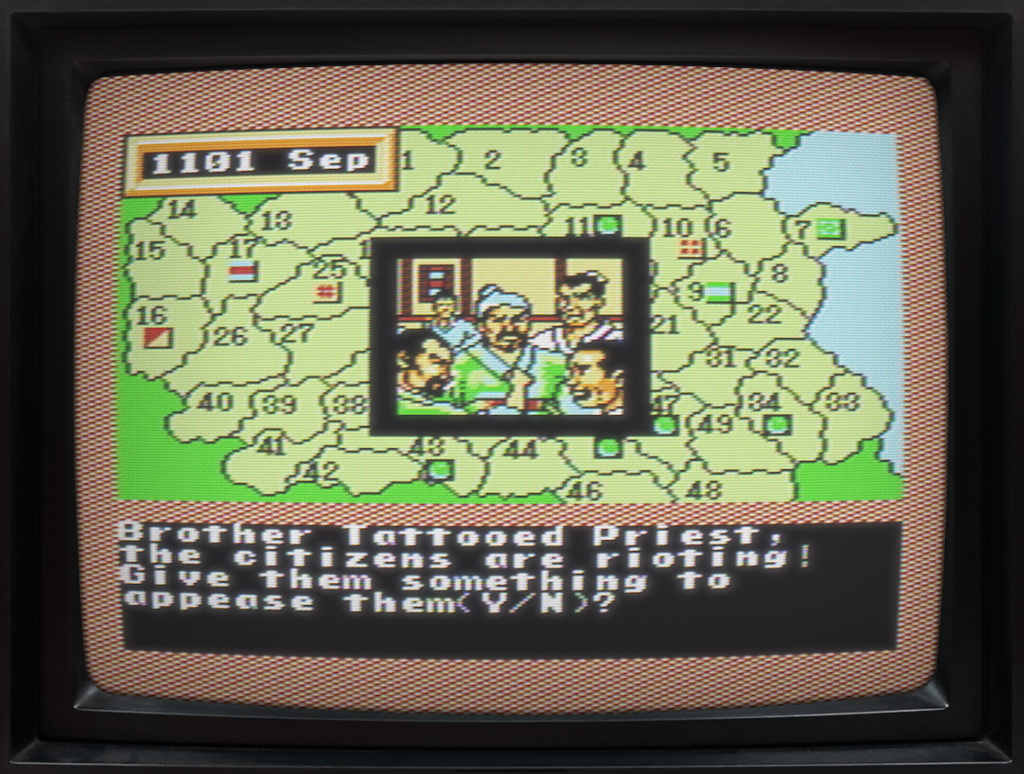
In a quick playthrough before writing this, I almost instantly had a riot. I tried to appease the citizens by giving them some food, but it didn’t work. Then, shortly after that, I was mauled by a tiger. I love this game.
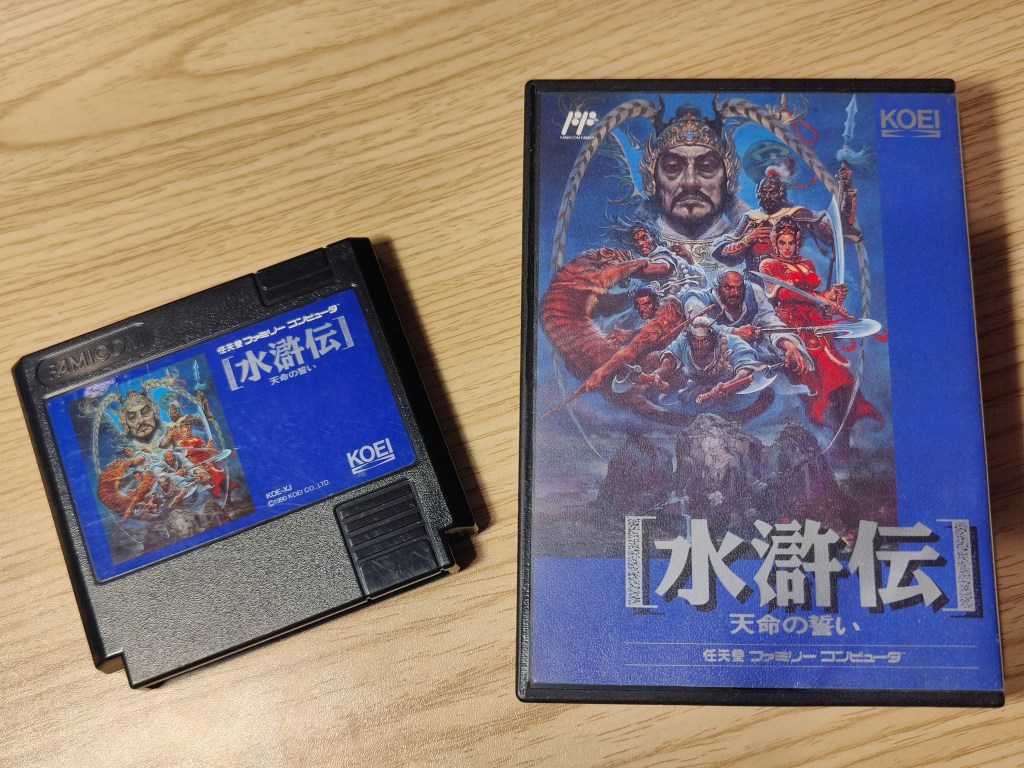
But let’s get back on topic. I have both the Famicom and NES versions of the game. I recently modded my Twin Famicom to output RGB, and I wanted to enjoy this game on that system. The issue is, I don’t know Japanese—and to play a strategy game, you kind of need to be able to read.
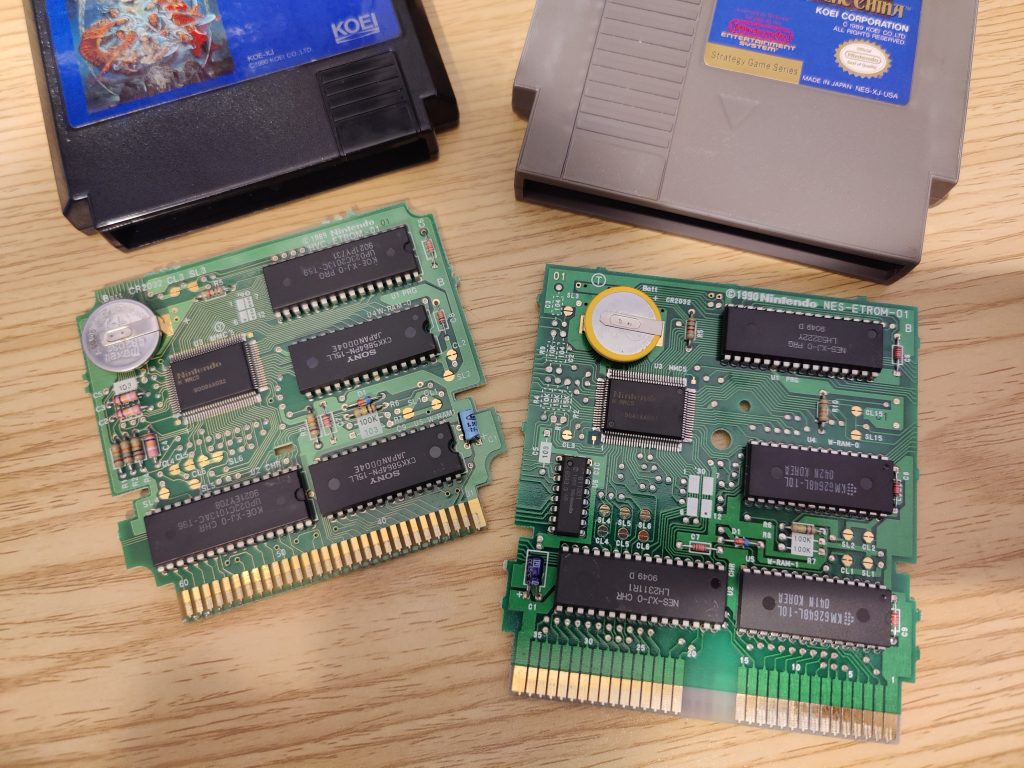
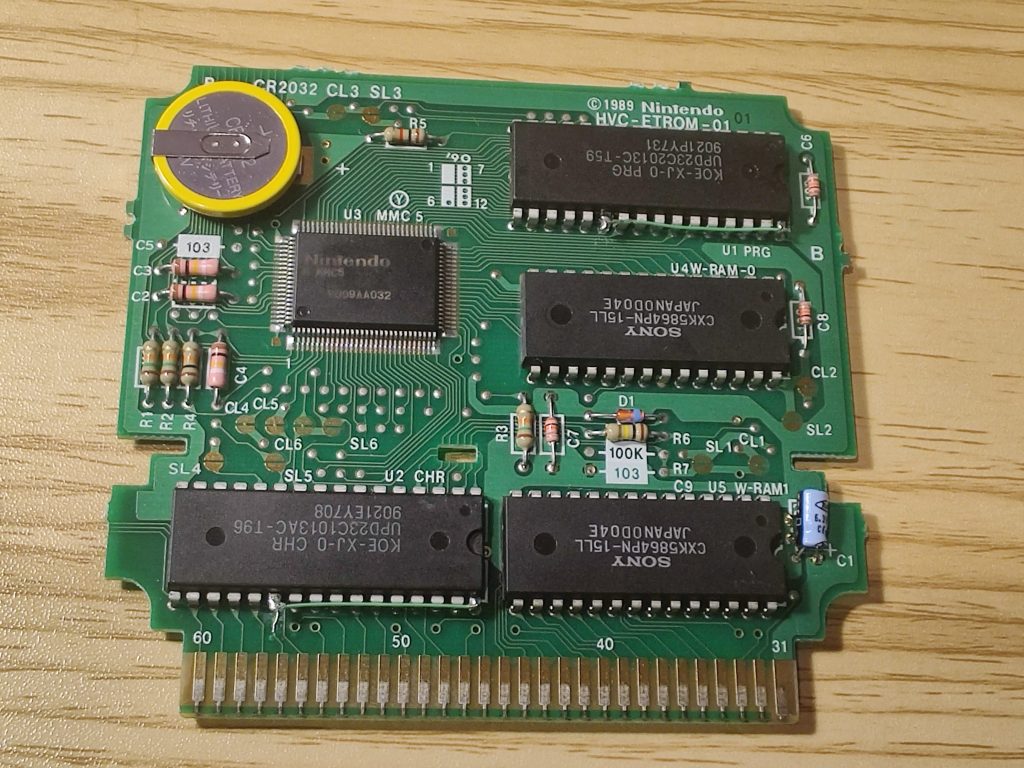
Hardware wise the cartridges are mostly identical.
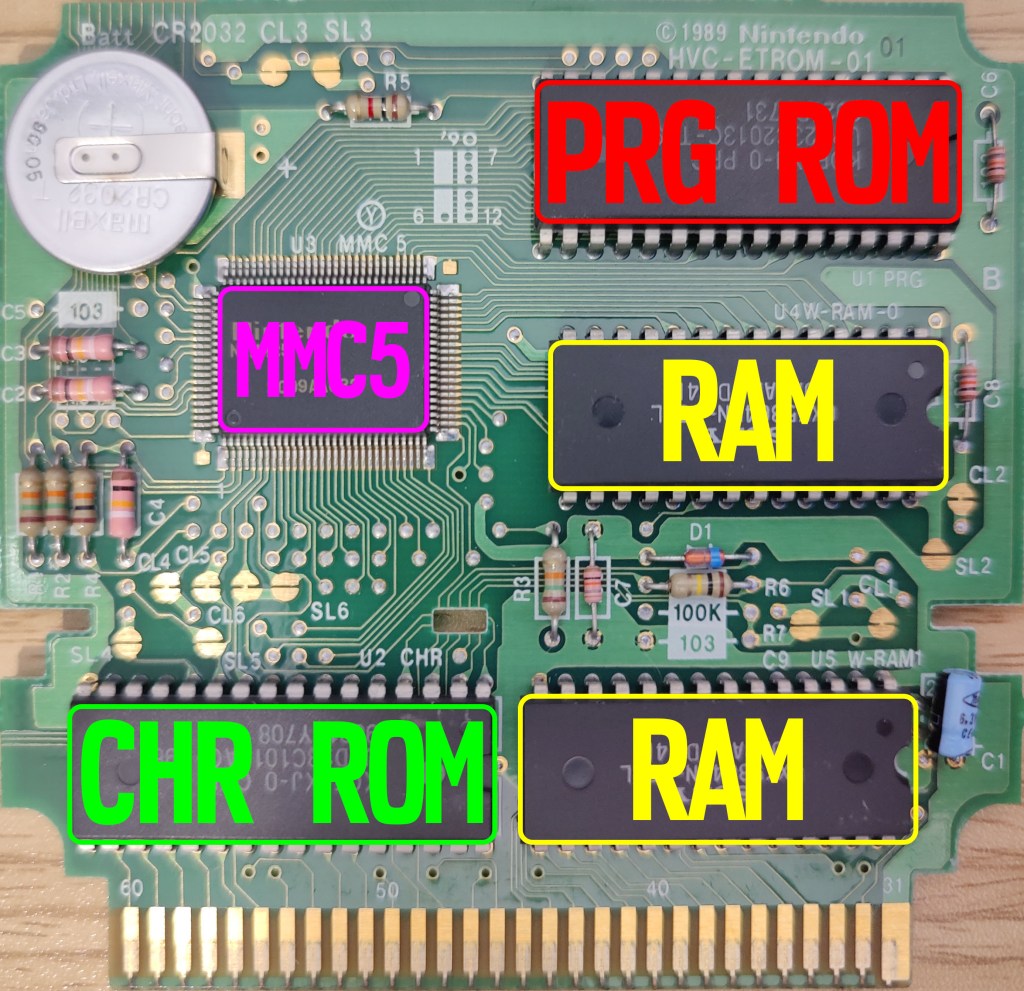
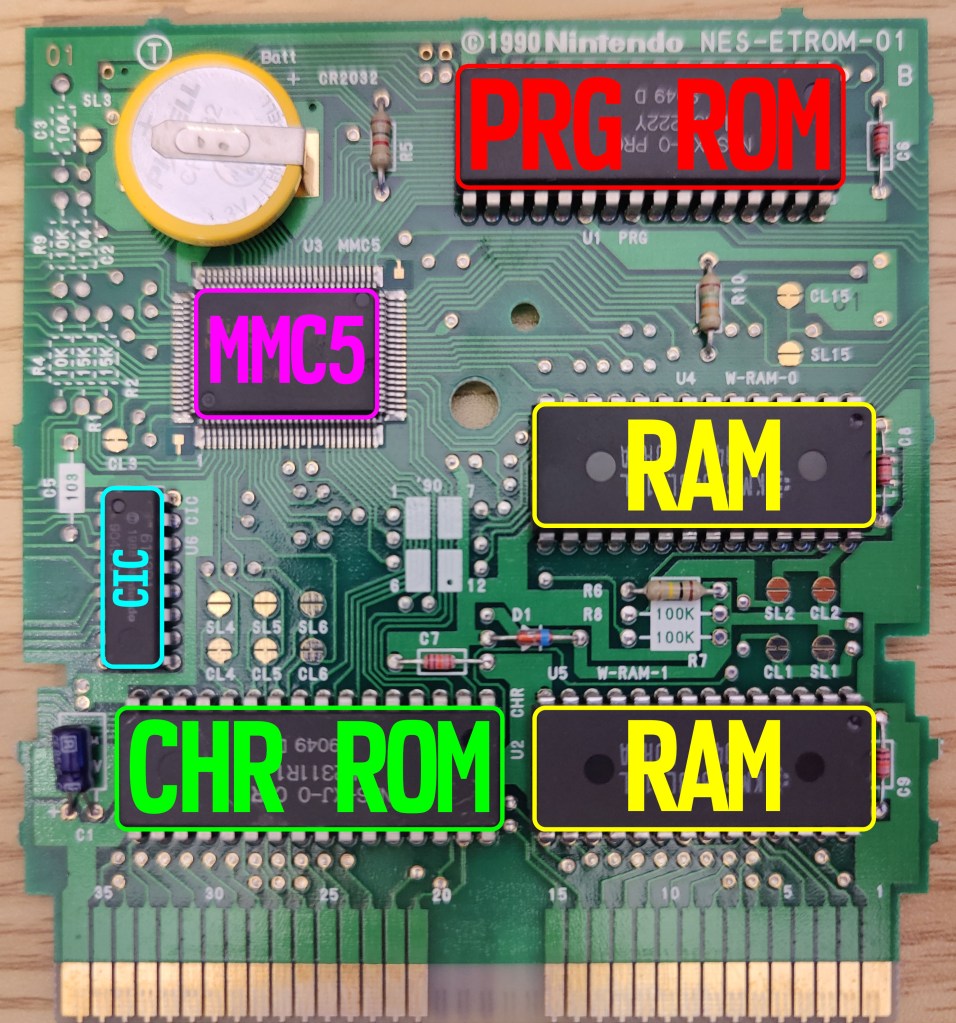
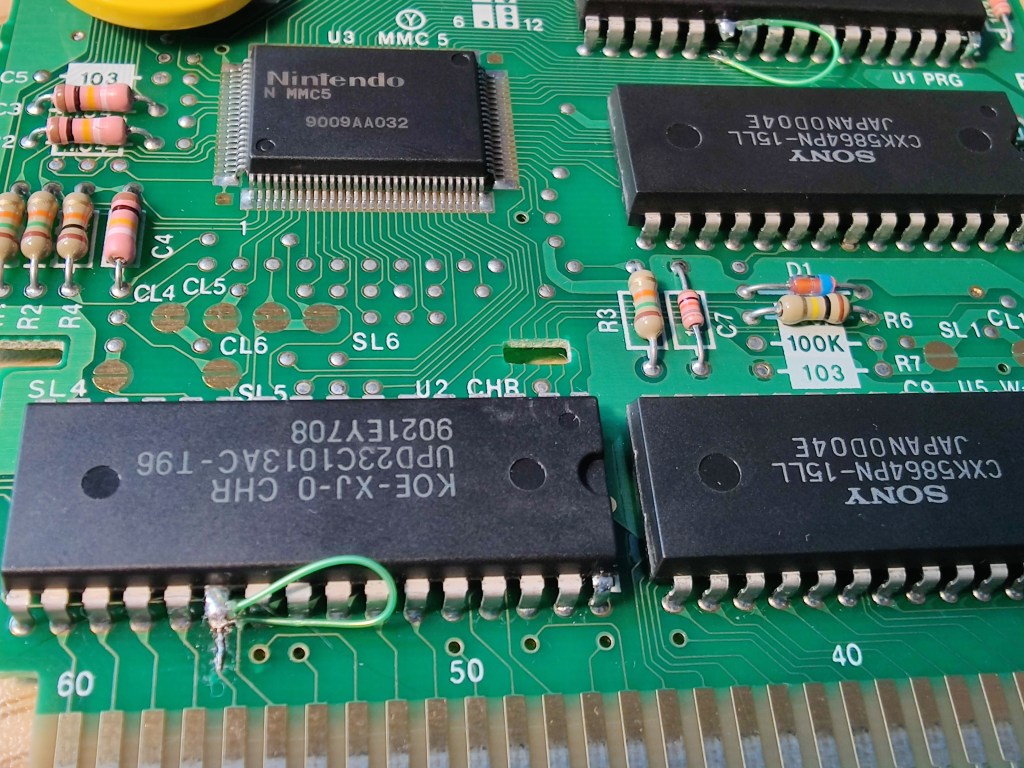
The main chips I need to focus on for this project are the PRG ROM, CHR ROM, and the MMC5 chip. Everything else I can ignore—but interestingly enough, the Checking Integrated Circuit (CIC) chip isn’t on the Famicom cart. This was the lockout chip Nintendo used to fight against counterfeits and maintain complete control over what games were released on the NES. If the console has a CIC, the cartridge must have one too for the game to run. It’s just interesting that the Famicom didn’t have this. I knew the top-loader NES didn’t have a CIC internally, but I guess if you’re using a Famicom-to-NES adapter on a front loader, the adapter needs to have a CIC built in.
The RAM on the carts aren’t from the same manufacturer, but they are the same size and share the same pinout, so I don’t have to worry about them.
The game is a later release and uses a Memory Management Controller (MMC), version 5. These chips really allowed the console to grow over the years. Unlike the Master System, the NES could expand its hardware via the cartridge. Since the NES console had limited RAM, the MMC can “swap” parts of memory in and out dynamically—this is called bank switching—and it effectively expands the system’s memory.
The MMC also helps with more advanced scrolling, like split-screen scrolling to create a parallax effect, or for example, Super Mario Bros. 3, which used MMC3, could do both horizontal and vertical scrolling—something older NES games without an MMC couldn’t pull off.
The remaining chips on the cart are the Mask ROMs. The NES used two ROMs: a PRG ROM and a CHR ROM. The PRG ROM (program ROM) holds all the game logic, while the CHR ROM (character ROM) holds the graphical sprite data. If the CHR ROM fails, the game can still run, but the graphics will be corrupted. If the PRG ROM fails, the game will crash entirely.
Of course I’m not going to swap the ROM chips to convert my Famicom cart to English. That would be way too costly. Bandit Kings is actually one of the most expensive games I own (around $120 USD in 2025), so cannibalizing it just isn’t an option.
Normally, I’d make a simple adapter, but the issue is that the CHR ROM and PRG ROM have different pinouts. And MMC5 ROMs are different from NON-MMC5 ROMs. So in total, that’s three separate pinout configurations to account for: CHR, PRG, and MMC5-style CHR/PRG.
So I tried making an adapter to handle all three pinout configurations. I did this by adding jumpers to switch the pin layout depending on which ROM the adapter was being used with. It was a tricky design, and—spoiler alert—it didn’t work. But before I get into what went wrong, let’s talk about how I installed them.

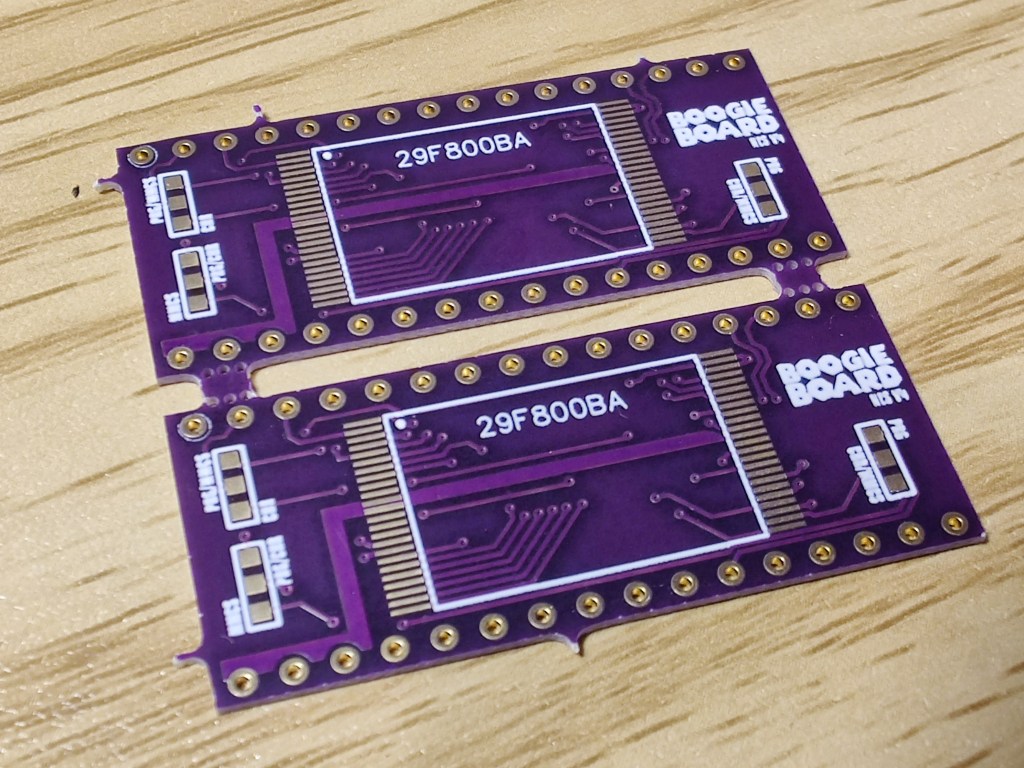
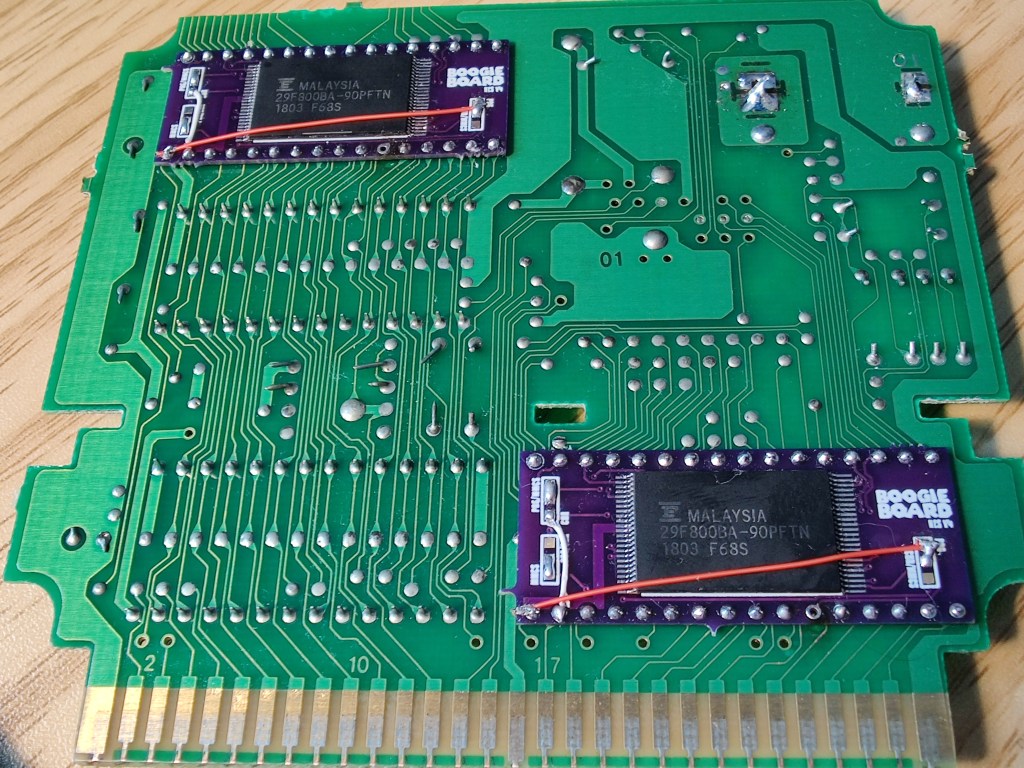
Just like the SNES Boogie Boards, these mount on the back side of the cart PCB, allowing the mask ROMs to stay in place. They’re designed to work with the 29F800 EEPROM, which is definitely overkill in terms of size—but it’s what I had lying around. These are 1MB EEPROMs that I mostly use for Game Boy games, but they’ll work just fine here.

But before I can flash the ROM onto the EEPROM, I need to prepare the files. Ever play a NES emulator or dump your own NES games? You might’ve noticed that the ROM files are just one file—not two separate ones. Well, I need to take that ROM and split it into its program and character sides. You can see in the image above that the PRG size is 256KB and the CHR size is 128KB. I use a program called famiROM to separate the NES ROM.
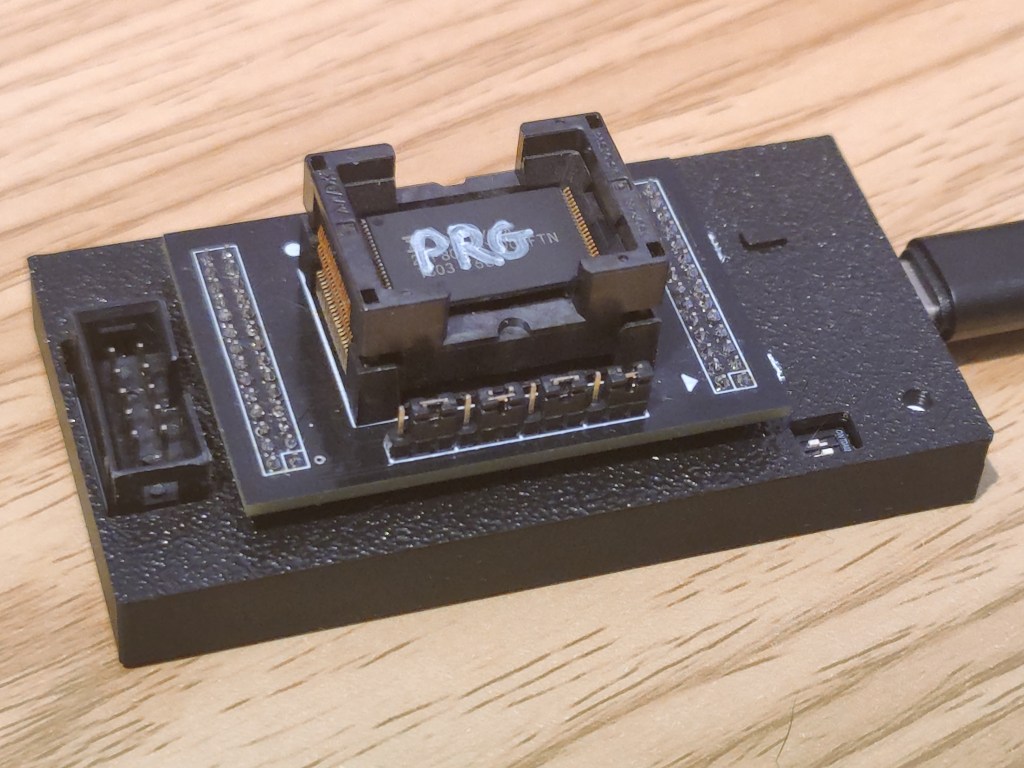
Once I have the ROM split, I’ll need to flash each EEPROM individually. I’m using my FlashcatUSB XPORT programmer for the job. These 29F800 EEPROMs are second-hand, so there’s no telling if they still work or what devices they came from. I always like to snoop through their contents before erasing them—sometimes you can guess what they were used for based on the leftover data.
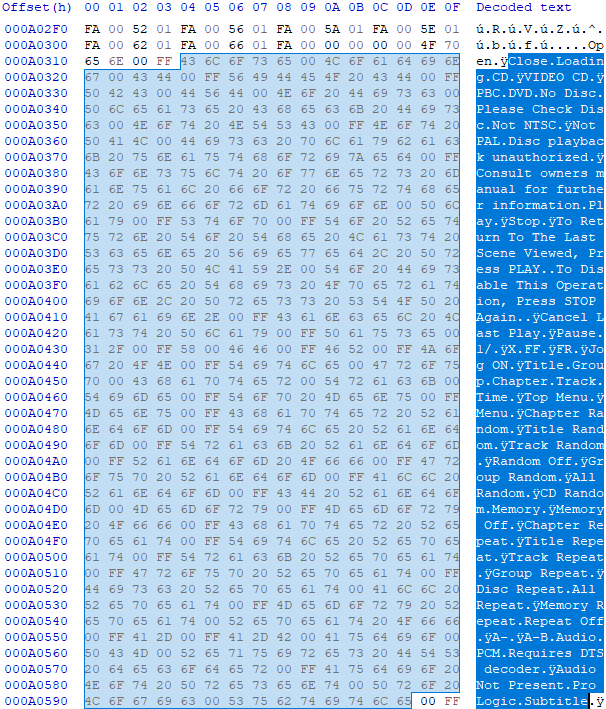
While combing through this EEPROM, I noticed some interesting terms. These are probably preset messages meant to be displayed at certain times. With terms like “NOT NTSC,” “CLOSE,” “LOADING,” “DVD,” “NO DISC,” “A-B AUDIO,” and “TOP MENU,” it’s pretty clear this chip most likely lived in a DVD player.
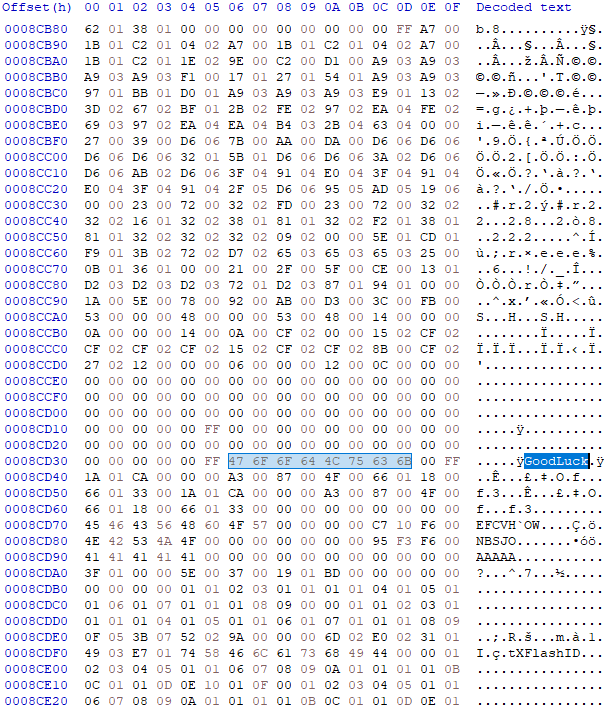
Well, that’s nice—it’s wishing me good luck. Honestly, I can’t think of a situation where I’d want my DVD player to say “Good Luck.” Maybe it was from a karaoke machine? I think I saw “VCD” somewhere in the hex editor, so that would make sense. Maybe it played Video CDs and had some karaoke features built in?
After programming the EEPROMs, I disabled the mask ROMs on the cart PCB by tying the CE (Chip Enable) pin to VCC. Doing this pulls CE high permanently, which puts the chip into a high-impedance state, effectively disabling it. This prevents any bus conflicts—you don’t want both the mask ROM and EEPROM trying to output data at the same time; that would be chaos.
The CE pin is normally used to enable or disable a chip during bus activity so there’s no interference. In this case, I’m just forcing the mask ROMs off entirely.
Alternatively, you could pull OE (Output Enable) high instead. That would leave the chip powered but “muted”—it wouldn’t speak on the data bus. But using CE is a cleaner method, as it effectively shuts the chip down completely.
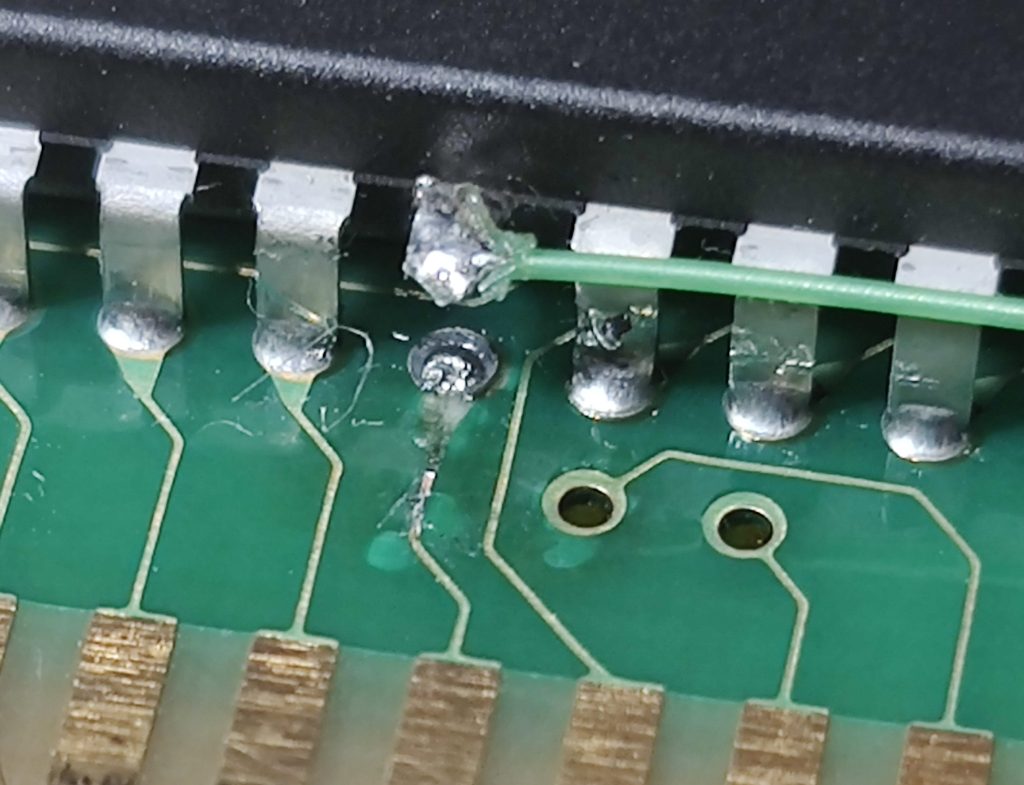
While isolating the CE pin, I broke a trace. I haven’t been that ham-fisted in a while, but mistakes happen. I’ll have to fix the trace running from the golden finger to that via. The CHR ROM won’t work otherwise.

I’m a bit concerned the jumper wire might foul on the case, but that’s a problem for future me.
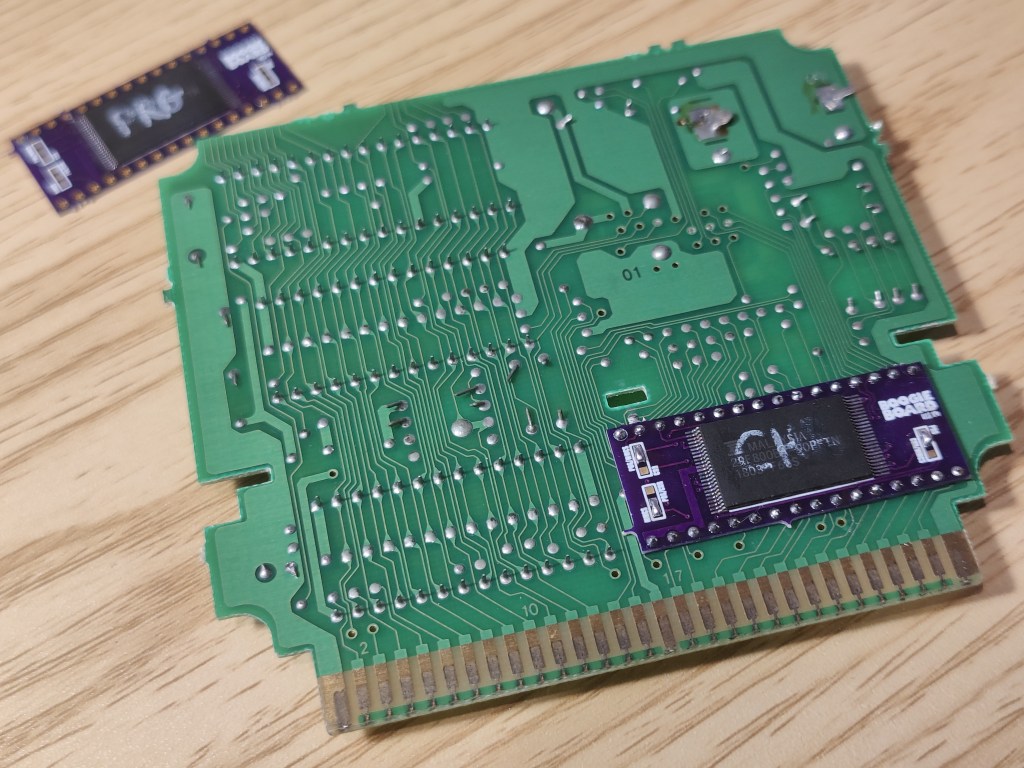
Once the programmed EEPROMs are soldered onto the Boogie Boards, I then solder them to the back of the PCB. You can see the CHR ROM is installed, and I’ve soldered the jumpers for MMC5.
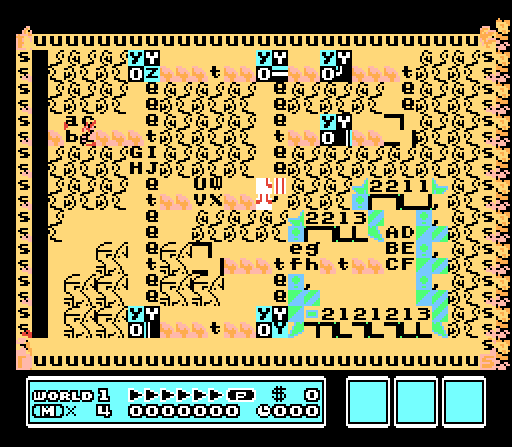
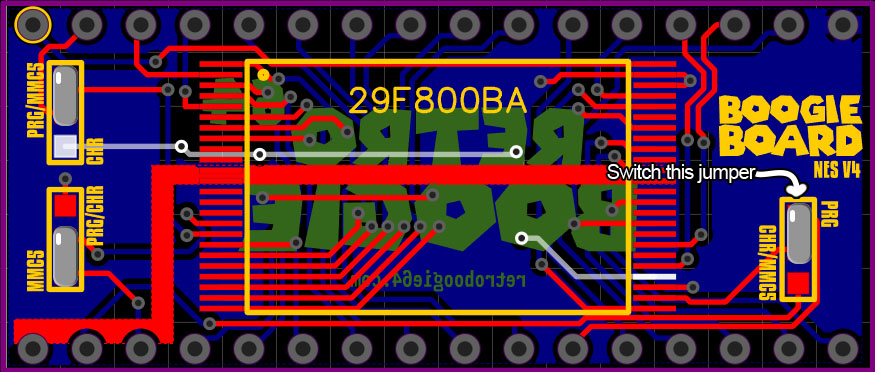
Speaking of the jumpers—that’s where I made a mistake. I tested these adapter boards by converting Laser Invasion to Uchuu Keibitai SDF before attempting Bandit Kings. During testing Uchuu Keibitai wouldn’t boot at all. After verifying all my connections were soldered correctly, the fact that the NES didn’t even detect a game made me suspect an issue with CE or OE. Remember me mentioning those? Well, if OE on my EEPROM wasn’t connected to anything and left floating, it wouldn’t output any data. After triple-checking my PCB layout, I found exactly that.
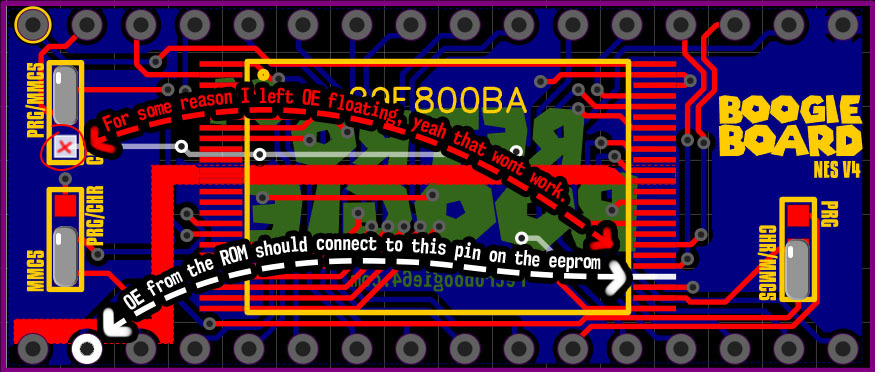
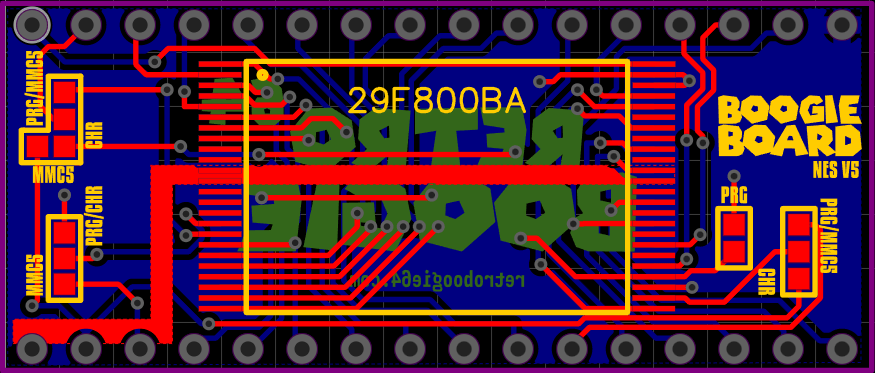
The top-left jumper is meant to route pin 2 from the cart either to A18—needed for PRG and MMC5 pinouts—or to OE, which is needed for the CHR pinout. But as you can see, once you make the jumper for PRG/MMC5, it leaves OE flapping in the breeze. I’ve already made a revision that fixes this. However, I still need to ensure CE is grounded when using the PRG pinout. I’ll have to add another jumper location to fix that. Revision 5 of this Boogie Board is going to look wild with all these jumpers.

I simply ran a jumper wire from that solder pad to the correct pin—a simple fix once you know what’s wrong.
But not only was OE wrong—CE was also wrong. I mislabeled this jumper and needed to connect CE to pin 22 of the ROM. Instead, I was sending it to pin 31, which is CE2 on MMC5. CE2 is usually pulled high, so sending CE to that pin would turn the chip off. Like I mentioned above, even if OE is LOW, the chip still can’t output data unless CE is also LOW. I straight up shut both chips off — no wonder it didn’t work.
So with all that figured out, the game just worked, right?
Wrong. It booted and was playable, but it wouldn’t save. I couldn’t figure out why—and this is a prime example of why you should TEST the damn game before modifying it. It could be a software issue or possibly faulty hardware. That means I now have to revert what I did so I can test the game in its original configuration.
So here I go, temporarily wiring the factory ROMs so CE is back in circuit.
I removed the CE connection going from the cart to the boogie boards and then grounded CE, fully isolating the EEPROM. Now I can test the game like I should have before I started.
Well, it’s back to the original configuration. I started a new game and quickly saved—now the question is, can I load it!?
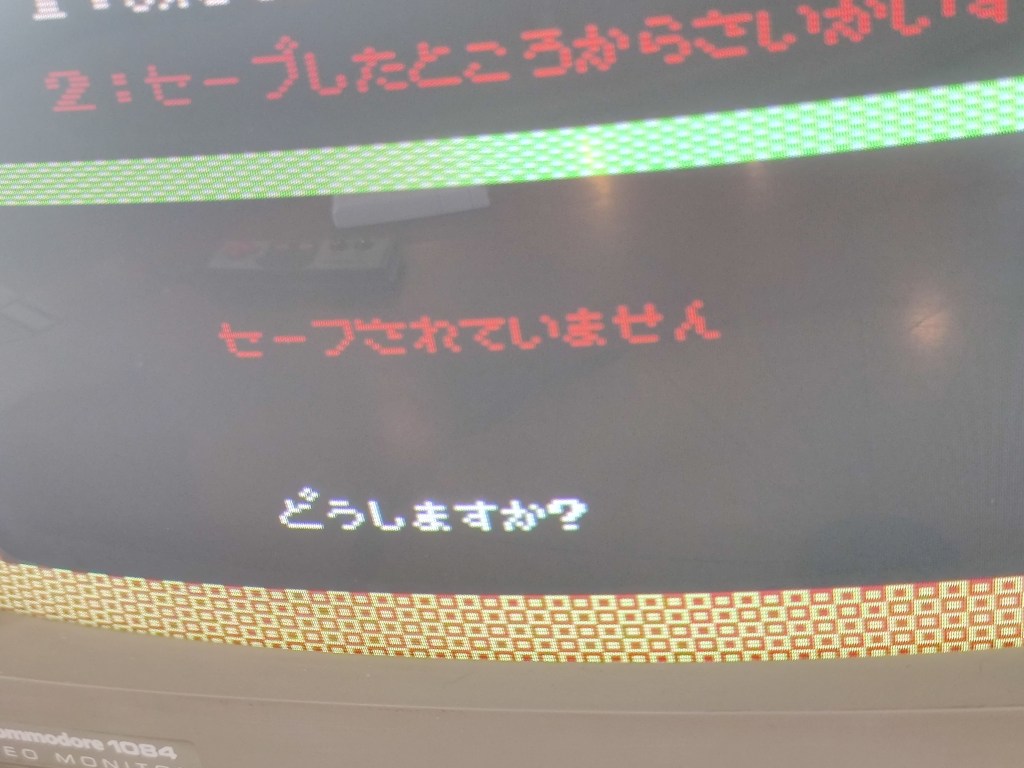
I know just enough hiragana to tell that definitely means there’s no save file. So even with the original configuration, it’s still not saving. Like… what?

I was about to give up when I realized the battery was in backwards… Eagle-eyed readers might’ve spotted this in one of the pics I posted earlier. I just wasn’t paying enough attention. I love how I was off thinking about karaoke DVD players whistling away while I soldered the battery on backwards like a total dufus.
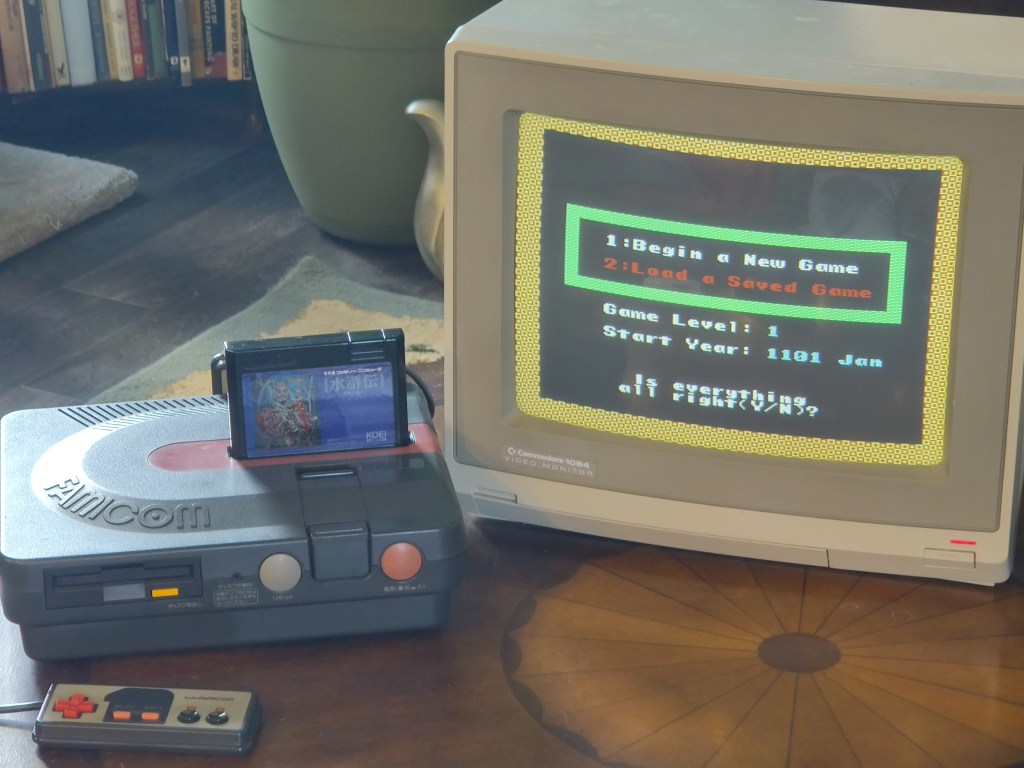
Voilà! I enabled the EEPROMs, disabled the original ROMs, swapped the battery polarity—and bingo! English Bandit Kings of Ancient China that saves!
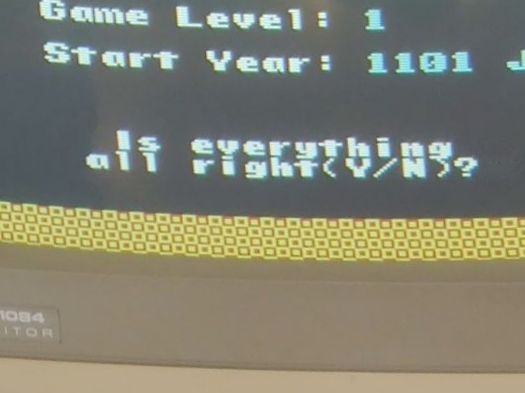
I love how the game asks, “Is everything all right?” Like—nah, not really, but I’m trying my best. Shit’s rough out here. Still, I wish all of you “good luck,” just like a DVD karaoke machine.
This project definitely didn’t go smoothly—but honestly, that’s kind of the point. Half the fun (and frustration) is working through the roadblocks. We all make mistakes, and sometimes the only way forward is to figure it out as we go. I dealt with broken traces, my own messy schematics, mislabeled jumpers, and even a backwards battery. But after all that, I’ve got a fully working English version of Bandit Kings of Ancient China.
If you liked this post, you might enjoy the one where I made a Game Boy GameShark PCB—spoiler alert, I made mistakes on that PCB too.
Until next time—later, nerds!

Leave a reply to retroboogie64 Cancel reply